Building a custom employee service catalog with Zendesk - Part 1: Laying the groundwork
The Zendesk service catalog is a tool available to employees to assist them in submitting service requests to teams like HR and IT. Zendesk admins populate the catalog with services and assets that employees commonly request, such as company laptops and leaves of absences.
Employees access the service catalog on the help center or on a custom website. When an employee submits a service request, a ticket is created for an internal team like IT or HR to solve.
The service catalog is hosted on a Zendesk help center by default. This tutorial shows you how to create a custom service catalog that can be hosted on a different website. A custom implementation is useful if you want to host your catalog on an internal website like your internal IT site.
Topics covered in this article:
- Who can use the service catalog?
- What you need for the tutorial
- Setting up your project folder
- Next part in the series
The other tutorials in the series show you how to use the Zendesk API to build the custom service catalog:
- Part 1 - Laying the groundwork - YOU ARE HERE
- Part 2 - Building a custom catalog browser
- Part 3 - Letting employees submit requests
Because the tutorials build on each other, tackle them in order and finish each tutorial before moving on to the next one.
Who can use the service catalog?
The service catalog is available in all Zendesk plans except the Team plan. In addition, your help center theme must support the service catalog. The service catalog is supported in standard help center themes and themes that were customized after July 31, 2025. If your help center uses a custom theme that was customized before July 31, 2025, you can update your custom theme to support the service catalog.
For more information, see Considerations for using the service catalog.
What you need for the tutorial
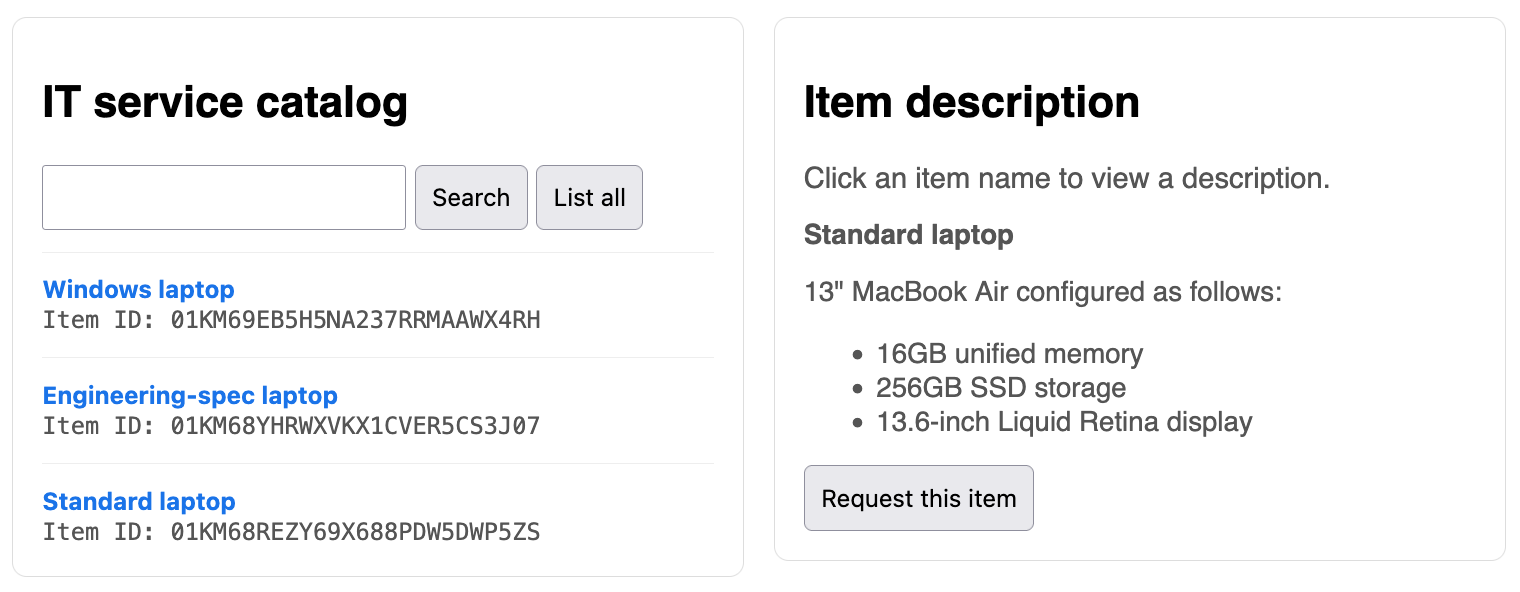
You can follow along in these tutorials with the examples. But if you want to get hands-on, you can set up a test catalog in Zendesk using the following tutorial in Zendesk help: Building an employee service catalog with Zendesk. The tutorial shows you how to build a small service catalog from beginning to end. The tutorial catalog is the one used in these tutorials.
To build a custom implementation with the Zendesk API, you’ll also need:
- any Zendesk Suite plan or a Support Enterprise plan
- A Zendesk API token
- A recent Python runtime installed on your system with a few additional libraries
Getting a Zendesk API token
To create an API token, you need admin access or somebody who has admin access.
To create a Zendesk API token
- In Admin Center, click Apps and integrations in the sidebar, then select APIs > API tokens.
- Click Add API token.
- (Optional) Enter a Description for the token.
- Click Save to generate the token.
Getting the Python runtime and the additional libraries
You should use Python 3.9 or greater for this tutorial. You'll also need three additional libraries to build the service catalog in this tutorial.
To get the Python runtime and libraries
- Download and install the latest version of Python from the Python downloads page.
- Open Terminal and install the following additional libraries with the
pipcommand:- requests, a user-friendly library for making web requests
- Flask, a lightweight web framework for building the backend and API endpoints for the demo web page in this tutorial
- python-dotenv, a library designed to make working with .env files simpler
Setting up your project folder
Create a folder and define environment variables for the project with an .env file. At runtime, the application reads settings from the .env file . The settings include your Zendesk subdomain, email address, and API token. The script uses a third-party library called python-dotenv to load these values at startup, so you don’t need to manually export environment variables every time you start the app.
-
Create a project folder called service_catalog for this tutorial.
-
In your project folder, create a text file named .env (with a leading period).
-
Use a text editor to paste the configuration ettings and into the file, replacing the values with your own:
ZENDESK_SUBDOMAIN=your_subdomainZENDESK_EMAIL=[email protected]ZENDESK_API_TOKEN=your_api_tokenNote that the values don't use quotes.
-
Save the updated .env file in your project folder.
-
If you're using GitHub for this project, add .env to your .gitignore file so it doesn't get pushed to the remote branch where others could access it.
Next part in the series
In the next part in the series, you'll build a custom catalog browser that employees can use to view laptops offered by the IT department.