Making API requests on behalf of end users
In Zendesk Support, an authenticated admin can make API requests on behalf of any verified end user. If a record is created, updated, or deleted, the change is associated with the end user, not the admin.
Note that end users can still make some API requests on their own behalf. For example, they can use the Requests API (but not the Tickets API) to create tickets on their own. See Tickets vs Requests APIs: How to select the right option for your project. See the "Allowed For" section for each endpoint in the API reference docs to see if end users can use it.
Making requests on behalf of end users consists of the following steps:
Related articles
Obtaining an OAuth access token with an impersonate scope
-
If not already done, create an OAuth client in Admin Center (Apps and integrations > APIs > OAuth clients).
-
When requesting or creating the OAuth access token, specify an "impersonate" scope.
Example when creating the access token with the API:
curl https://{subdomain}.zendesk.com/api/v2/oauth/tokens.json \-H "Content-Type: application/json" \-d '{"token": {"client_id": "your_client_id", "scopes": ["impersonate", "write"]}}' \-X POST -H "Authorization: Bearer {access_token}"Only admins can use the API to create OAuth access tokens.
Example when sending a user to the authorization page in an authorization flow:
https://z3napi.zendesk.com/oauth/authorizations/new?client_id=my_test_client&scope=impersonate+write&response_type=code
Making the request
Only Zendesk Support admins can make requests on behalf of end users.
Note: The impersonated end user must have an existing user profile. Otherwise, the request will fail as an invalid_token.
-
In your request, use the access token to set an "Authorization" header. curl example:
-H "Authorization: Bearer 8b56769914d4c38617a389cab95124042c3c3eadf3f66d5dc9d7df2a7bca21e2" -
Set a "X-On-Behalf-Of" header that specifies either the user's username (the user's email address), or user ID. Examples:
-H "X-On-Behalf-Of: [email protected]"or
-H "X-On-Behalf-Of: 203427634"
Example request
curl https://z3napi.zendesk.com/api/v2/tickets/1/satisfaction_rating \-H "Authorization: Bearer 8d56769914d4a38617a389cab90524042c3c3ebdf3f66d5dc9d7df2a7bca21e2" \-H "X-On-Behalf-Of: [email protected]" \-H "Content-Type: application/json" \-X POST \-d '{"satisfaction_rating": {"score": "good", "comment": "Awesome support."}}'
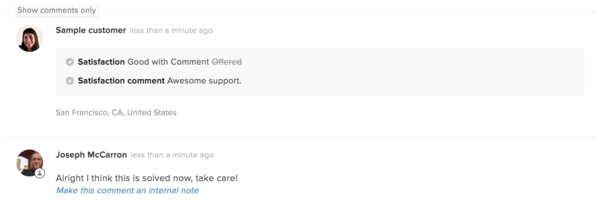
The example adds a satisfaction rating to the ticket.
Note: The Create Satisfaction Rating endpoint only works on tickets with a status of Solved, or on tickets that were reopened after being solved. The endpoint doesn't work on tickets with a status of Closed or on archived tickets. For more information, see What's the difference between a solved ticket and a closed ticket.