Quick start: Updating phone greetings or IVR settings for specific dates with Make
There are scenarios where updating phone greetings or Interactive Voice Response (IVR) settings on particular dates is necessary. For example, you may want to use a different "Available agents" greeting during holidays or offer a simplified IVR with fewer options outside of normal business hours.
In this quick start, we'll update the default voicemail to use a custom greeting for July 7-8, 2025, and modify the IVR for a phone line to run daily at 6pm. Then, starting July 9, 2025, the voicemail will revert to its default. While Talk doesn't support scheduling these changes directly, you can accomplish this by integrating Zendesk APIs with no-code platforms like Make.
What you'll need
-
A Zendesk Support account or a trial account. You can request a sponsored test account that doesn't expire after 14 days like the trial account.
-
Make. A cloud-based automation platform that enables you to connect apps and services without coding. You can complete all steps in this quick start using their free account.
Disclaimer: This article is intended for instructional purposes only. Zendesk does not provide support for the apps or example code presented here, nor does it support third-party technologies such as Make.
Updating a phone greeting for a specific dates
You can change the following greeting types for a phone number:
- Voicemail: Greeting played based on whether voicemail is enabled.
- Available agents: Greeting played when agents are available to take calls.
- Hold: Greeting played when callers are on hold.
- Wait: Greeting played while callers wait in the queue.
- Callback: Greeting played to callers who request a callback.
- Callback confirmation: Greeting played to confirm the callback was successfully requested.
- Call recording consent opt-in: A greeting that asks the user to press a specific key (for example, 3) on their keypad to consent to call recording.
- Call recording consent opt-out: A greeting that asks the user to press a specific key (for example, 3) on their keypad if they do not wish to have their calls recorded.
Generating an API token in Zendesk
First, you'll need to create an API token to authenticate your API requests.
-
In Admin Center, click Apps and integrations in the sidebar, then select APIs > API Tokens.
-
Click Add API token.
-
Enter a Description and click Save. The token is generated and displayed.
-
Copy the token and save it somewhere secure (you'll need it later).
Note: Once you click Save to close this window, the full token will never be displayed again.
-
Click Save again to return to the list of API tokens.
Changing the greeting of a line on a specific date
To change the greetings of a phone number you'll need to:
- Find the id of the phone number you want to update.
- Find the id of the greeting(s) you want to use.
- Configure the Make integration to schedule the greeting change for the chosen date(s).
Finding the id of a phone number
To find the id of a phone number, you'll need to run a command in Terminal.
- MacOS: In the Finder, open the /Applications/Utilities folder, then double-click Terminal.
- Windows (on Windows 10, it's called Command Prompt): Press Ctrl+Alt+T.
Now run this command:
% curl https://{subdomain}.zendesk.com/api/v2/channels/voice/phone_numbers \ -v -u {email}/token:{token} | python3 -m json.tool
Note: The pipe to python3 -m json.tool is optional but formats the JSON output for easier reading.
Scroll through the output to locate the phone number you want to modify. The corresponding id will be displayed above it. Store it as you'll need it later.
{"phone_numbers":[{"id": 32870456138001,"country_code": "US","created_at": "2025-02-21T16:24:46Z","external": false,"number": "+16501234567",...}]}
Finding the id of a greeting
If you plan to use a custom greeting and haven't created this greeting yet, see Managing outgoing greetings. In this quick start, we'll use a custom greeting for the dates July 7-8, 2025.
Run the following command in Terminal:
% curl https://{subdomain}.zendesk.com/api/v2/channels/voice/greetings \ -v -u {email}/token:{token} | python3 -m json.tool
Scroll through the output to locate your custom greeting, in this example "My custom greeting", and note its id and category id. Store both numbers, as you'll need them later.
{"greetings": [{"id": 33351984647575,"name": "My custom greeting","category_id": 1,"default": true,...}]}
Also look for the current greeting you will be replacing, in this example the default greeting, and save it's id and category_id for later use. You'll need this to revert to your current greeting starting July 9.
{"greetings": [{"id": "voicemail_en","name": "Default (voicemail on)","category_id": 1,"default": true,...}]}
Configuring an app in Zendesk
Create an OAuth client in Zendesk Admin Center to gather the necessary information for connecting Make and Zendesk.
-
In Admin Center, click Apps and integrations > APIs > OAuth clients.
-
Click Add OAuth Clients.
-
On the Create a new OAuth client page, configure the following:
- Client name: Enter a descriptive name for your client.
- Unique identifier: Enter an identifier such as "my_oauth_client". You'll need this later, so copy it and store it safely.
- Client Kind: Select Confidential.
- Redirect URLs: Enter
https://www.integromat.com/oauth/cb/zendesk/
-
Click Save.
A warning appears, advising you to copy and store the secret as it won't be shown in full again.
-
Copy the Secret value and store it safely.
-
Click Save.
Creating a new scenario in Make
Open Make and create a new scenario from where you'll configure the Zendesk integration.
-
If you haven't already done so, create your free Make account.
-
Sign in to your Make account.
-
From the Make navigation panel, click Scenarios.

-
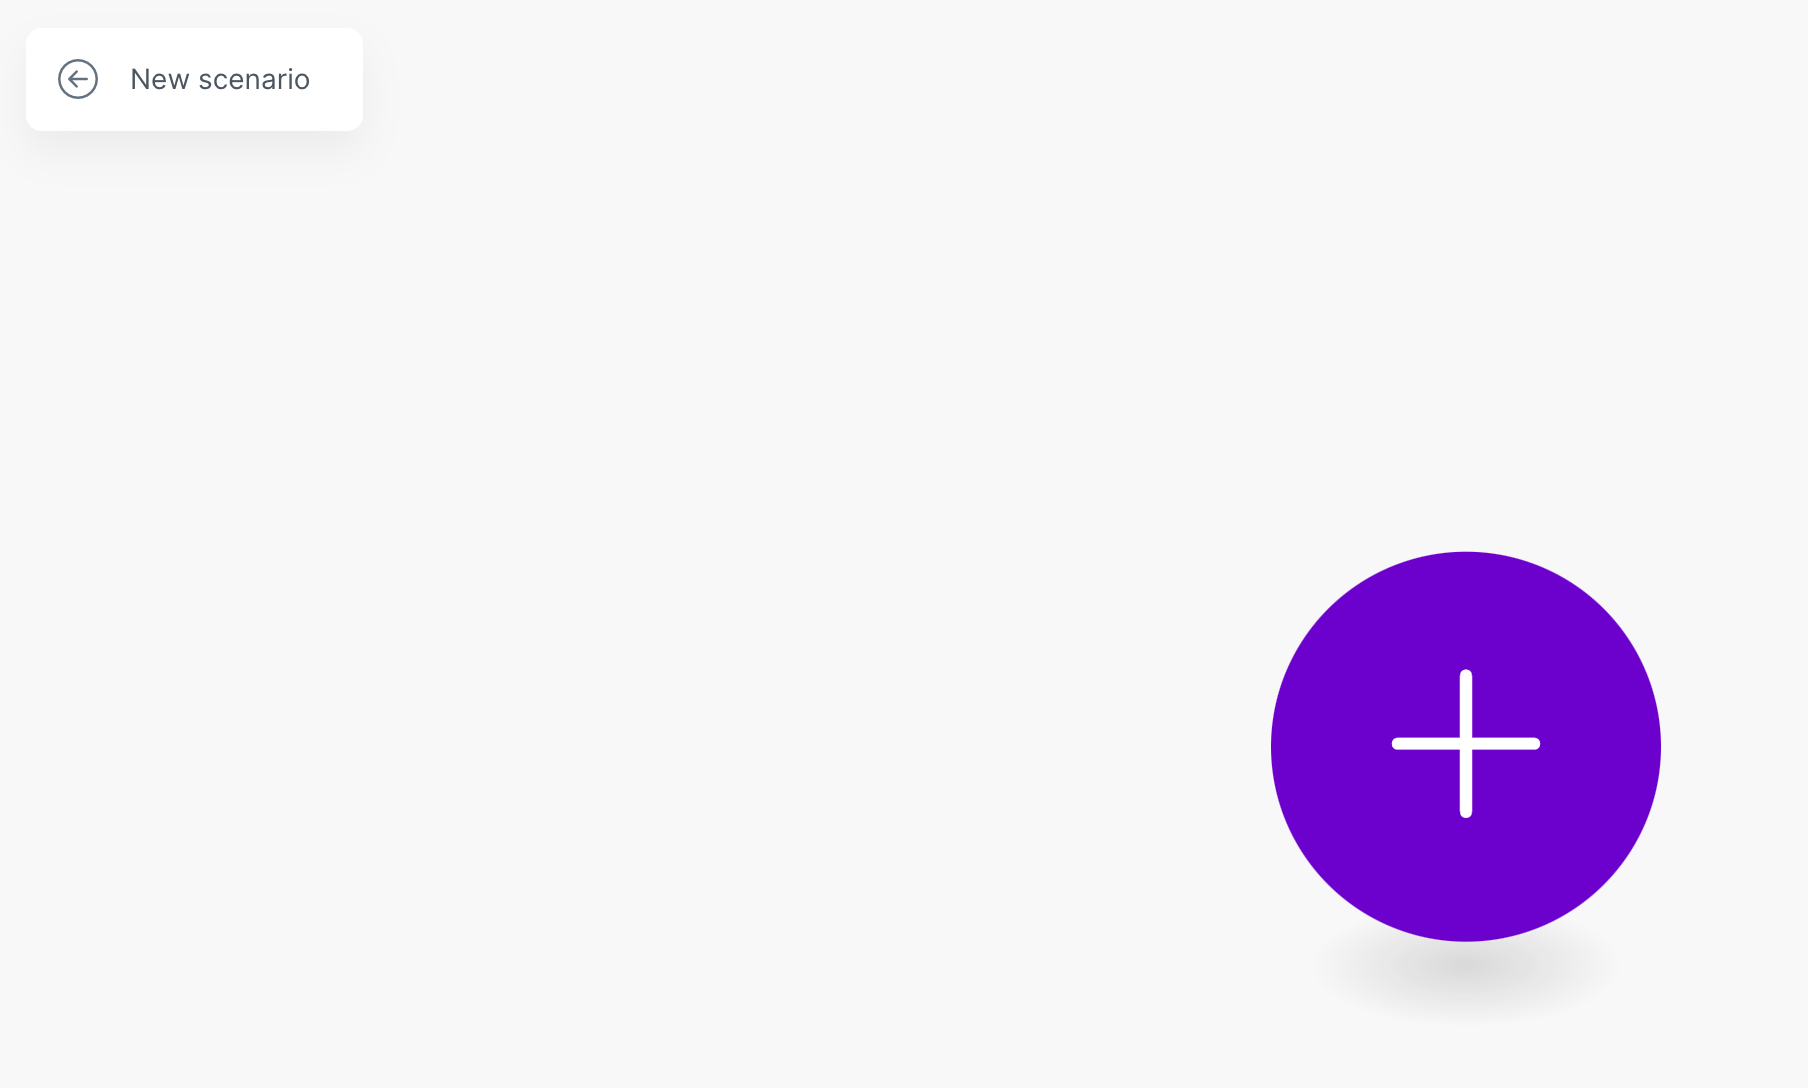
On the All scenarios page, click Create a new scenario.
-
On the New scenario page, click the plus icon if it's not already selected.
-
From the list of apps, select Zendesk.
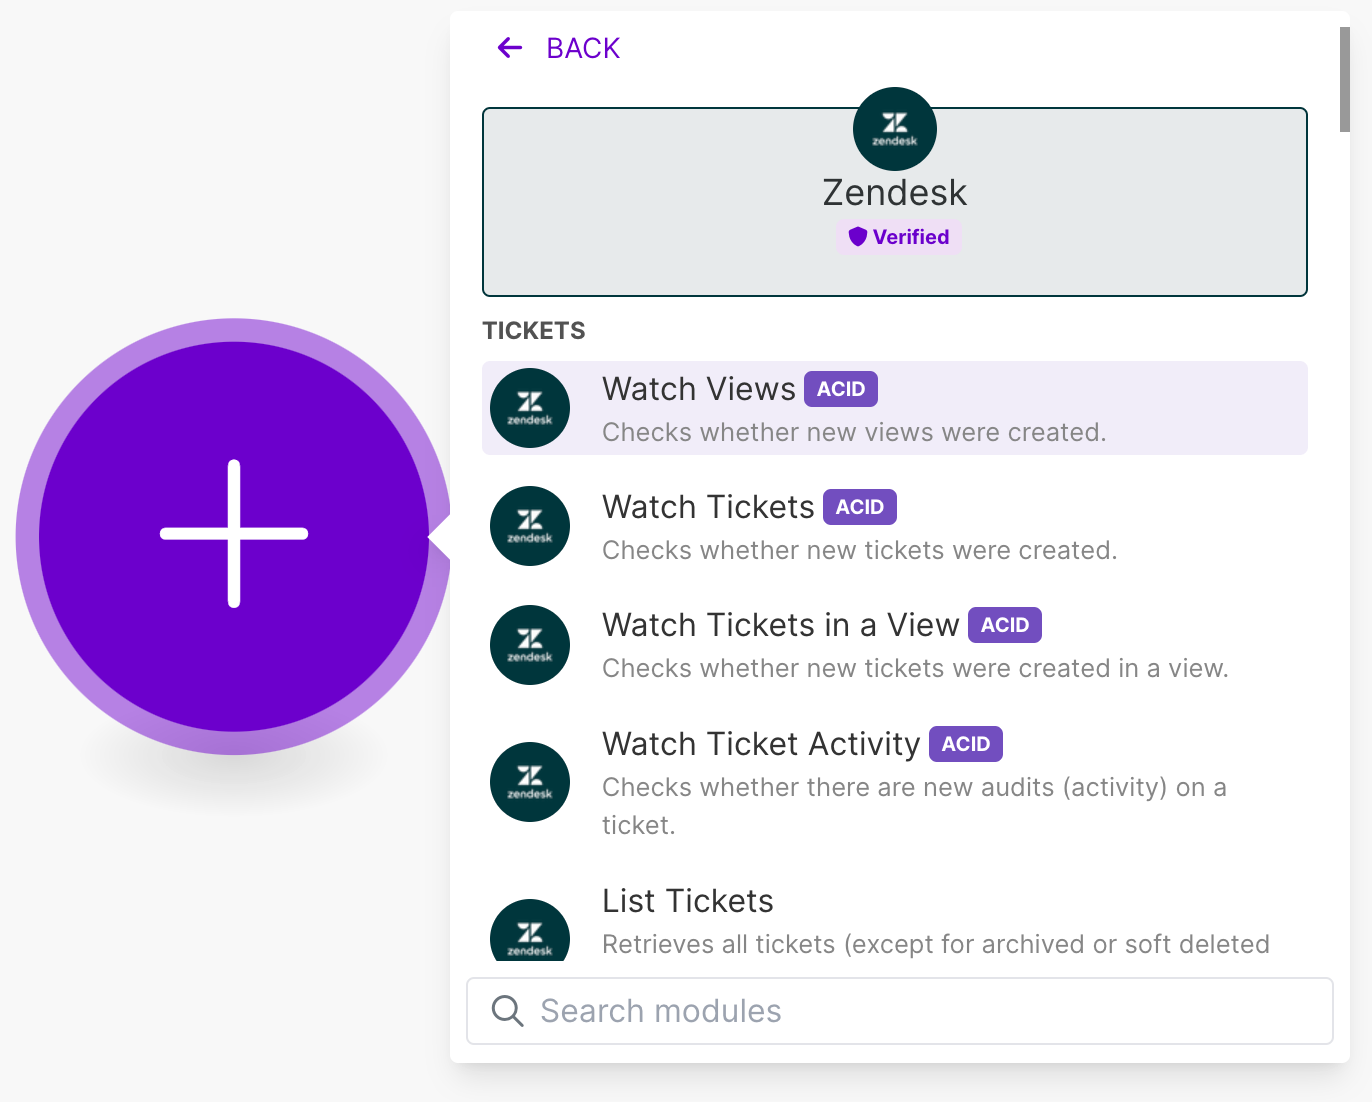
-
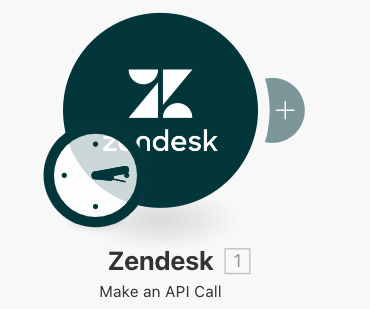
From the list of Zendesk modules, search for Make an API Call and click it.
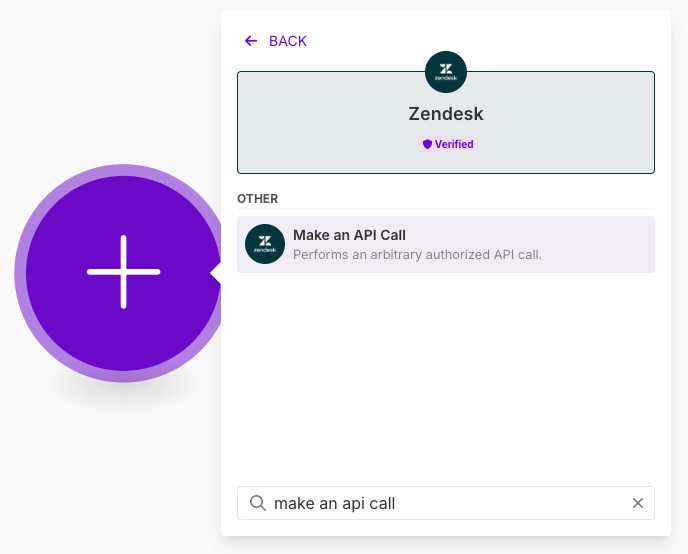
Configuring the Zendesk integration
Next, configure the connection between Make and Zendesk.
-
In Make, from the scenario you created, click Create a connection.
-
Enter the following details:
- Connection name: Provide a descriptive name for the connection, such as "My Zendesk Connection".
- Domain: Enter your Zendesk domain name. For example, mycompany.zendesk.com.
- Unique identifier: Enter the identifier you created in Configuring an app in Zendesk.
- Secret: Enter the secret value you generated in Configuring an app in Zendesk.
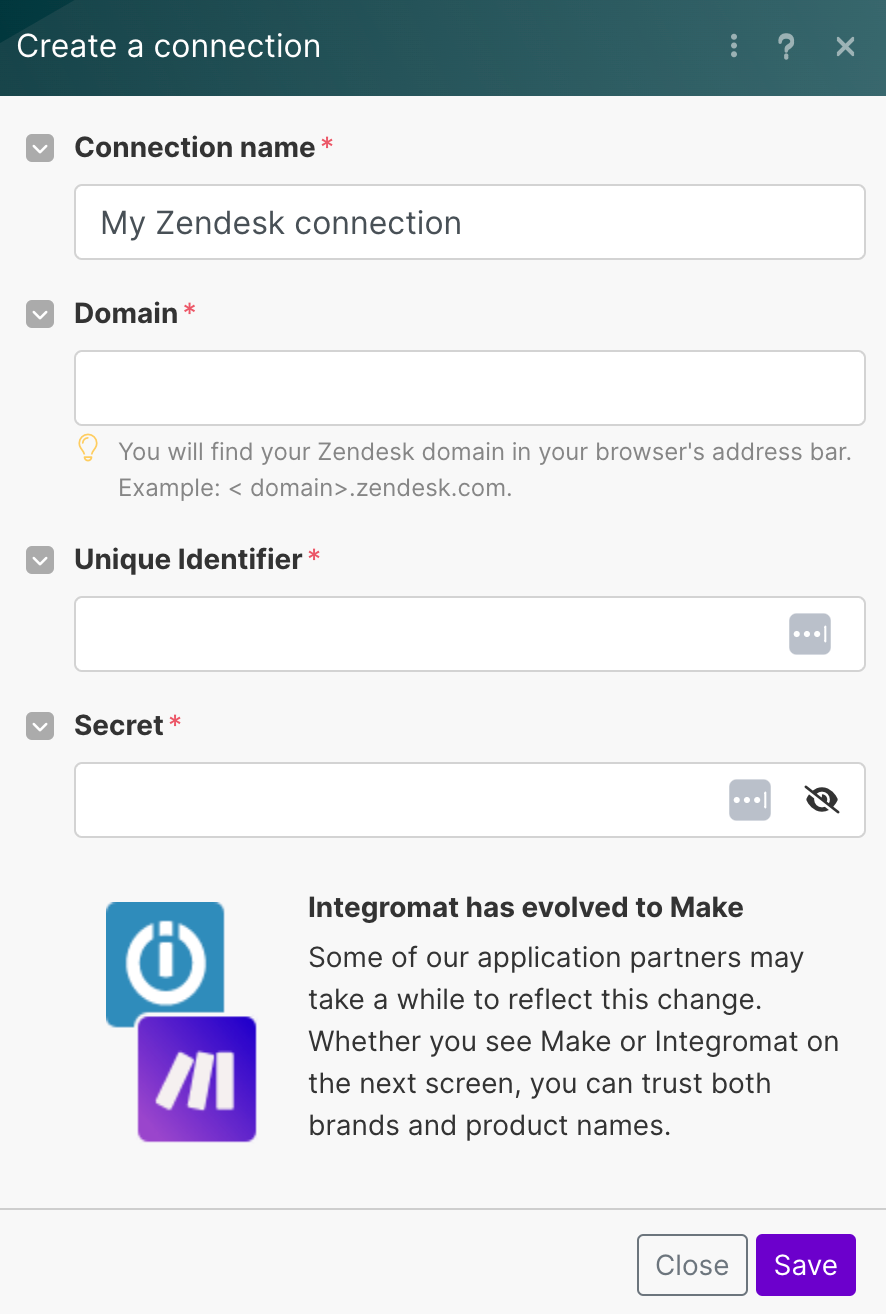
-
Click Save.
-
If you receive a confirmation page, click Allow.
Setting up the API call
The Zendesk API has an Update Phone Numbers endpoint that can change most phone line settings. Before you start using it, you need the id of the phone number to configure, the greeting category number, and the greeting id. See Finding the id of a phone number.
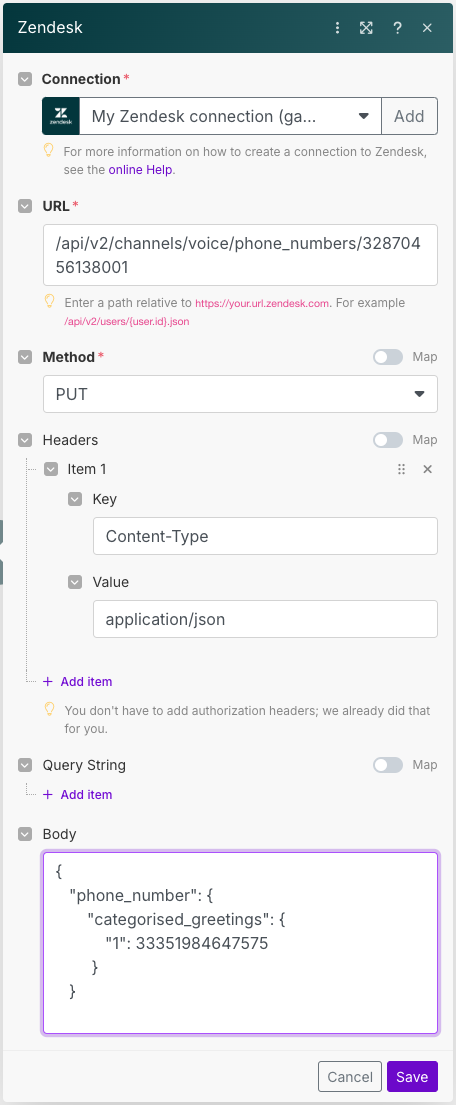
In this quick start, we'll update the voicemail greeting to use our custom greeting.
-
In Make, if the Connection window is not active, click the Zendesk scenario and configure the following values:
- URL:
/api/v2/channels/voice/phone_numbers/{phone_number_id} - Method:
PUT - Body:
{"phone_number": {"categorised_greetings": {"1": 33351984647575}}}Replace
{phone_number_id}with the id obtained from Finding the id of an phone number. - URL:
-
Click Save.
-
Click the hard disk icon in the lower portion of the window to save your scenario.
-
Click the Clock associated with the module.
-
Select Specified dates and select July 7 and the time to start using the custom greeting.
-
Click Save to activate the scenario and return to the Make Scenarios page.
-
Click Run once to test your scenario, then verify in Zendesk the greeting is applied correctly.
To test if your scenario works, try using today's date but set a time a few minutes later to verify the schedule is working. We recommend testing the scenario on a test line not used by your customers.
You'll want to create a second scenario to restore the greeting to its original state. To do this, clone the existing scenario and update it to use your previously default voicemail greeting and the new schedule (make the default greeting active on July 9). This way, you don’t need to build a new scenario from scratch. In this example, we'll revert to "voicemail_en" as the greeting.
To clone your scenario:
-
From the Make navigation panel, click Scenarios.
-
Click the "Integration Zendesk" scenario.
-
At the top of the page, click "Integration Zendesk" and rename it to "Test greeting".
-
From the Make navigation panel, click Scenarios.
-
Click the pulldown menu next to "Test greeting" and select Clone.
-
Name your new scenario and click Yes to keep the state of the new module the same as the old.
-
Open the Connection window and change the body to the original greeting. In this example "voicemail_en":
{"phone_number": {"categorised_greetings": {"1": "voicemail_en"}}} -
Click Save.
-
Click the Clock associated with the module and select July 9 as the start date.
-
Click Save.
In the end, you’ll have two scenarios: one that activates on July 7 and is enabled on July 7 and 8, and another that activates July 9 and later.

Changing the IVR of a phone line
Changing the IVR follows the same process as updating a greeting. Identify the id of the phone line to be changed, then locate the id of the IVR you want to assign to that phone line for a specific date and time.
This tutorial assumes the desired IVR is already set up. In this example, we use an IVR called "Off-hours IVR", scheduled to activate at the end of the shift at 6pm.
Finding the id of an IVR
To find the id of the IVR, run the following command in Terminal:
% curl https://{domain}/api/v2/channels/voice/ivr \ -v -u {email}/token:{token} | python3 -m json.tool
Scroll through the results until you find the id of the IVR you want to use on a schedule.
{"id": 3085305429489,"name": "Off-hours IVR","menus": [{"id": 30853054300945,...}]}
Configure the integration
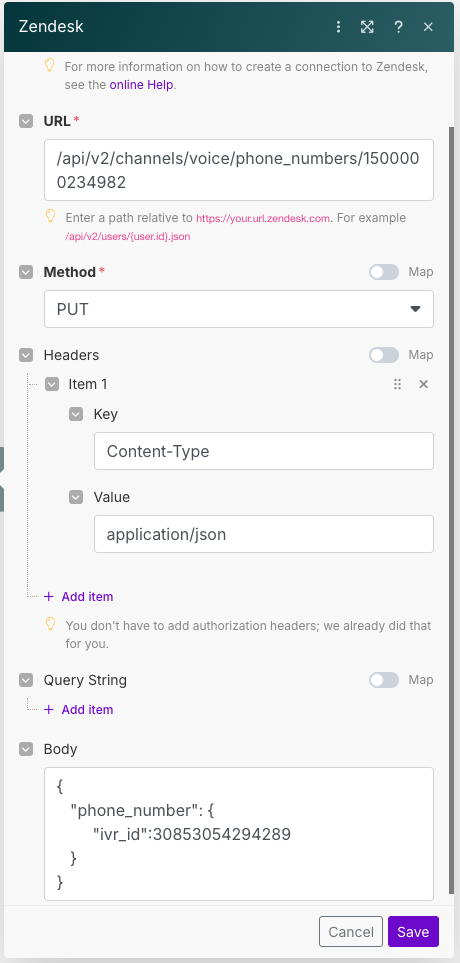
Follow the instructions in Setting up the API call to create a new scenario using the Zendesk "Make an API request" template. If this step is already completed, you can clone the existing scenario and update the following settings:
- URL:
https://{domain}/api/v2/channels/voice/phone_numbers/{phone_number_id} - Method:
PUT - Body:
{"phone_number": {"ivr_id": 30853054294289}}
Replace {phone_number_id} with the id obtained from Finding the id of an phone number. In the Body, set "ivr_id": to the id retrieved from Finding the id of an IVR.
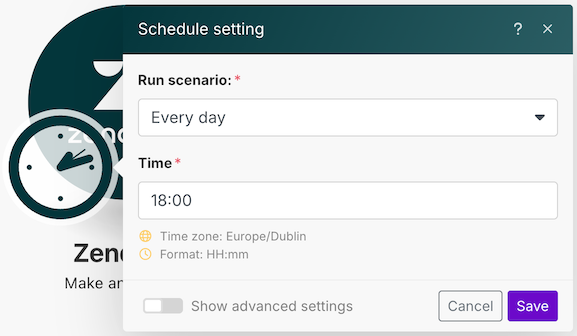
Click Clock to configure the date and time for the API call. For example, schedule it to run daily at 6 pm.
Clone this scenario and modify it to reset the IVR to its original state at the end of the day.

Changing the greeting of an IVR menu
Suppose you only want to change the greetings of select menus rather than replacing the entire IVR on a specific date. This approach is useful for cases like announcing different business hours during holidays.
For this scenario, you will need to:
- Find the id of the IVR greeting you wish to apply on a specific date.
- Find the id of the IVR you wish to modify.
- Find the id of the IVR Menu you wish to apply the greeting to.
For steps 1 and 2, see Finding the id of a greeting and Finding the id of an IVR.
Finding the id of an IVR Menu
To find the id of the IVR Menu, run the following command in Terminal, replacing {ivr_id} with the id in Finding the id of an IVR:
% curl https://{subdomain}.zendesk.com/api/v2/channels/voice/ivr/{ivr_id}/menus \ -v -u {email}/token:{token} | python3 -m json.tool
{"id": 1900000011913,"name": "Main Menu","default": true,"greeting_id": 18106883278481,"routes": [{"id": 360001086957,"keypress":"2","greeting": null,"action": "group","options": {"group_ids": [8781221370001,4411966416529]}"option_text": "Group Scully","overflow_options": ["Group Widson"]}}
Find the IVR menu that you want to change the greeting.
Configure the integration
Follow all the previous steps to create a new scenario, configure the connection, and then configure the API request as follows:
-
URL:
/api/v2/channels/voice/ivr/{ivr_id}/menus/{ivr_menu_id} -
Method:
PUT -
Body:
{"ivr_menu": {"greeting_id": 18106883278481}}
Replace {ivr_id} and {ivr_menu_id} with the ids found in Finding the id of an IVR menu. For "greeting_id":, use the id you found in Finding the id of a greeting.
Set your schedule and you're done.
You'll want to create a second scenario to restore the IVR greeting to its original greeting later.