Importing users with the Zendesk API
The Zendesk API is often used to import users from other systems into a Zendesk instance. This article gives an example of how to use the Zendesk API to import users. It assumes the user data was exported from a third party application such as QuickBooks to an Excel worksheet.
If your user data is stored in an application with its own API, you can tap both APIs to transfer the data without having to export it to a worksheet or some other format such as JSON first.
The article uses Python, a powerful but beginner-friendly programming language with a clear and readable syntax. If you work in another language, you should still be able to follow the code logic and adapt it to your script. The logic is similar in all languages.
Disclaimer: Zendesk provides this article for instructional purposes only. Zendesk does not support or guarantee the code. Zendesk also can't provide support for third-party technologies such as Python.
Deciding to import users
In many cases, you don't have to do anything to import users into Zendesk. Most user accounts in Zendesk are created automatically when a customer submits a ticket for the first time.
To decide if you need to import users, look at how your Zendesk instance is set up. A Zendesk instance can be set up to be open to all users, restricted to a group of users with specific email domains, or closed to all users except the ones you specify.
-
If you have an open Zendesk instance, you don't need to import users. The site is accessible to the general public. A new user account is created in Zendesk when a user submits a ticket for the first time.
-
If you have a restricted Zendesk instance, where only users with email addresses in approved email domains can submit tickets, you don't need to import users either. A new user account is created automatically in Zendesk when a user from an approved email domain submits a ticket for the first time.
-
If you have a closed Zendesk instance, only the users that you add can sign in and submit tickets. A typical example is an IT support department.
Even if you have a closed Zendesk instance, you don't have to use the API to import users. You can use the bulk user import feature in the Zendesk admin interface. See Bulk importing users and organizations. Each option has its strengths and weaknesses. For example, the API only accepts up to 100 users per request while the bulk import feature accepts up to 2,000 users at a time. The bulk import feature however can't import certain data that the API can, such as the user's time zone, photo, and language preference.
Users API basics
The following endpoint in the Users API lets you import multiple users at once:
POST /api/v2/users/create_many.json
It creates up to 100 users per request.
Some systems may have more than one way to identify the user. Possible user identities include a secondary email address, an X (formerly Twitter) handle, or a phone number. To create users with multiple user identities, see Create User with Multiple Identities.
Before you start importing users with this API, make sure to configure your account settings in Zendesk to get the results you want when the users are imported. For example, do you want welcome emails to be sent automatically to the new users? See Sending the email verification message to users you add.
Mapping your user data to Zendesk user data
Start by mapping your user properties to the Zendesk user properties. For example, you can map your name and email properties to the name and email properties in Zendesk. You can also map custom data to the user_fields property in Zendesk. See Adding custom fields to users.
Reading the user data
This article assumes the user data was exported to an Excel worksheet. You can download the users_list.xlsx sample file to try out the script in the article.
Before you can import the user data in the worksheet, you first have to read it.
Suppose you want to import the following user properties from your worksheet:
- name
- membership level (a user can have a gold, silver, or bronze membership)
You map these properties to the following user properties in Zendesk:
nameemailuser_fields, to accommodate a "Membership Level" field
To include your "Membership Level" field, you or an admin in your organization should create a custom user field in Zendesk. Specify member_level as the field key. See Adding custom fields to users.
Assume the names, emails, and membership levels are contained in columns C , D , and F respectively in your Excel worksheet. For the script, convert the Excel column positions from letters to index numbers, which are easier to work with in scripts. Because indexes typically start with 0, the C , D , and F columns correspond to column indexes 2 , 3 , and 5 .
name= index 2email= index 3user_fields= index 5
Assuming the Excel file is named users_list.xlsx and it's located in the same folder as the Python file, you can read the worksheet's data with the following Python script:
from openpyxl import load_workbookusers = []workbook = load_workbook(filename='users_list.xlsx')sheet = workbook['Sheet1']for row in sheet.rows:if row == list(sheet.rows)[0]: # skip the first rowcontinueif row[2].value: # a name is required in Zendeskusers.append({'name': row[2].value,'email': row[3].value,'user_fields': {'member_level': row[5].value}})for user in users:print(user)
The script reads the user data in the worksheet and repackages the data as a list in the users variable.
Try it out
-
Download and install the latest version of Python.
-
Create a Python file in a new project folder and name it anything you like. The name import_users.py is a solid choice.
-
Paste the script in the file and save it.
-
Download the users_list.xlsx sample file and place it in the same folder as the Python file.
-
Install the OpenPyXL library, which the script uses to work with Excel workbooks. To install it, run the following command at the prompt in your command line interface:
pip install openpyxlpip is a utility included in Python for installing and managing Python packages.
-
Run the script by running the following command:
python3 import_users.pyIn your command line interface, make sure you navigate to the folder that contains your Python file before running the script.
The script should read the users from the Excel file and print it to your console. Example:
{'name': 'Jon Hayward', 'email': '[email protected]', 'user_fields': {'member_level': 'gold'}}{'name': 'Sue Jones', 'email': '[email protected]', 'user_fields': {'member_level': 'bronze'}}{'name': 'Ben Clarkson', 'email': '[email protected]', 'user_fields': {'member_level': 'silver'}}
How it works
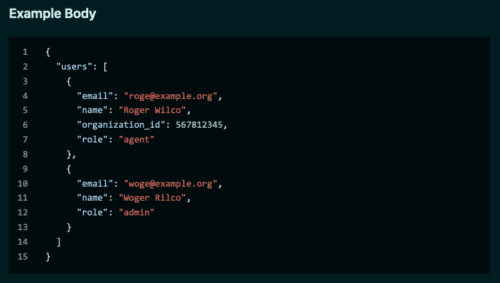
The code extracts the values from the workbook into a data structure that matches the JSON format expected by the API. According to the docs, the Create Many Users endpoint expects a list of user objects (or dictionaries in Python) named "users":
The script leads off by creating a variable to store the list:
users = []
Next, it uses the OpenPyXL library to load the worksheet into memory:
workbook = load_workbook(filename='users_list.xlsx')sheet = workbook['Sheet1']
The script then iterates over each row in the worksheet to collect the data:
for row in sheet.rows:# collect user data
Each iteration performs a couple of checks. The first check looks for the first row in the worksheet at index 0 and skips it because it consists of column headings.
if row == list(sheet.rows)[0]: # skip first rowcontinue
The second check makes sure the row specifies a user name:
if row[2].value:# collect the user data
A name is required to create a user in Zendesk. The script only collects the row's user data if a name is specified. Otherwise, the script ignores the row and moves to the next one.
Next, the script assigns the values from columns 2, 3, and 5 to a new dictionary, which is then appended to the users list:
users.append({'name': row[2].value,'email': row[3].value,'user_fields': {'member_level': row[5].value}})
The row[i].value property returns the value of the cell at the specified column index -- indexes 2, 3, and 5 in this case.
Note: If one or more columns in your Excel worksheet consist of number ids, openpyxl reads them as floats and adds a trailing 0 (1.0, 2.0, 3.0) to them. (Excel treats all numbers as floats.) If you're importing values like external ids, convert the values back to integers with the int() method when you extract the values. Example:
'external_id': int(row[2].value)
After iterating through all the rows in the worksheet, the users variable contains the name, email, and membership level of each user. The ending snippet prints the data to the console so you can check that it worked:
for user in users:print(user)
Delete the 2 lines when you're done testing.
Importing the users with the API
The users variable should now contain the list of users to be imported into Zendesk with the API.
Update the script with the added highlighted lines to import the users into Zendesk:
import timefrom openpyxl import load_workbookimport requestsimport os# get the users from the XLSX fileusers = []workbook = load_workbook(filename='users_list.xlsx')sheet = workbook['Sheet1']for row in sheet.rows:if row == list(sheet.rows)[0]: # skip first rowcontinueif row[2].value: # a name is required in Zendeskusers.append({'name': row[2].value,'email': row[3].value,'user_fields': {'member_level': row[5].value}})# prepare the API requestsZENDESK_ACCESS_TOKEN = os.getenv('ZENDESK_ACCESS_TOKEN')ZENDESK_SUBDOMAIN = 'your_subdomain'HEADERS = {'Authorization': f'Bearer {ZENDESK_ACCESS_TOKEN}'}url = f'https://{ZENDESK_SUBDOMAIN}.zendesk.com/api/v2/users/create_many.json'# Slice the list of users into batches of 100batch_size = 100num_users = len(users)start = 0for start in range(0, num_users, batch_size):stop = start + batch_sizebatch = users[start:stop] # Get the next batch of 100 users# Post the batch to Zendeskdata = {'users': batch}response = requests.post(url, json=data, headers=HEADERS)if response.status_code == 429: # Check for rate limitprint('Rate limit reached. Please wait.')time.sleep(int(response.headers['retry-after']))response = requests.post(url, json=data, headers=HEADERS) # Retry requestif response.status_code != 200: # Check for errors other than rate limitprint(f'Import failed with status {response.status_code}')exit() # Exit on errorprint('\nImport done.')
Replace the {your_subdomain} placeholder with your value. Store ZENDESK_ACCESS_TOKEN as an environment variable for security reasons.
How it works
The script starts by importing the requests library, a third-party Python library for making HTTP requests.
To install the library on your computer, run the following command on the command line:
pip install requests
It also imports the time library, which is a native Python library, to handle possible rate limiting.
Next, the code creates variables to be used in the API requests, such as your OAuth Bearer token authentication header and the url of the API endpoint. For details, see Create Many Users in the API reference.
The Create Many Users endpoint only accepts up to 100 users at a time, so the script sets up a loop to slice the list of users into batches of 100:
batch_size = 100num_users = len(users)start = 0for start in range(0, num_users, batch_size):stop = start + batch_sizebatch = users[start:stop] # get the slice of users
The loop updates the stop and start counters for the users[start:stop] slice expression. The following are the start and stop values of the first three iterations:
batch = users[0:100]batch = users[100:200]batch = users[200:300]
In the first iteration, the 0 means start the slice at the first element in the list. The 100 means stop the slice at the 100th element but don't include it.
Next, the script imports the slice of 100 users to Zendesk with the API:
data = {'users': batch}response = requests.post(url, json=data, headers=HEADERS)if response.status_code == 429:print('Rate limit reached. Please wait.')time.sleep(int(response.headers['retry-after']))response = requests.post(url, json=data, headers=HEADERS)if response.status_code != 200:print(f'Import failed with status {response.status_code}')exit()
The script also checks to make sure the rate limit hasn't been reached. The limit is reached when the response returns a 429 status code. In that case, the script pauses for the number of seconds specified by the retry-after header in the response. After the time expires, the script tries the request again.
After importing the first batch of users to Zendesk, the script loops to get the next batch of users and import them.
Code complete
Feel free to change and adapt the script to learn more about how it works. For example, create another sample xlsx file that includes other user fields and then import the data. Or instead of getting users from an Excel worksheet, adapt the script to get them from a real or fictional API.
Note that the script is for instructional purposes only and shouldn't be used in a production environment.