Building your first Chat app - Part 2: Designing the user interface
In the previous tutorial in this series, you installed ZCLI and created the starter files for an app named Learn More. In this tutorial, you'll work on the user interface so that it meets the design requirements of your app. The tutorial covers the following tasks:
- Setting the app's location in Chat
- Reviewing the main HTML file
- Testing the app
- Cleaning up the default code
- Adding a footer
- Adding styles
This tutorial is the second part of a series on building a Zendesk app:
- Part 1 - Laying the groundwork
- Part 2 - Designing the user interface - YOU ARE HERE
- Part 3 - Creating and inserting templates
- Part 4 - Getting data
- Part 5 - Installing the app in Zendesk Chat
Setting the app's location in Chat
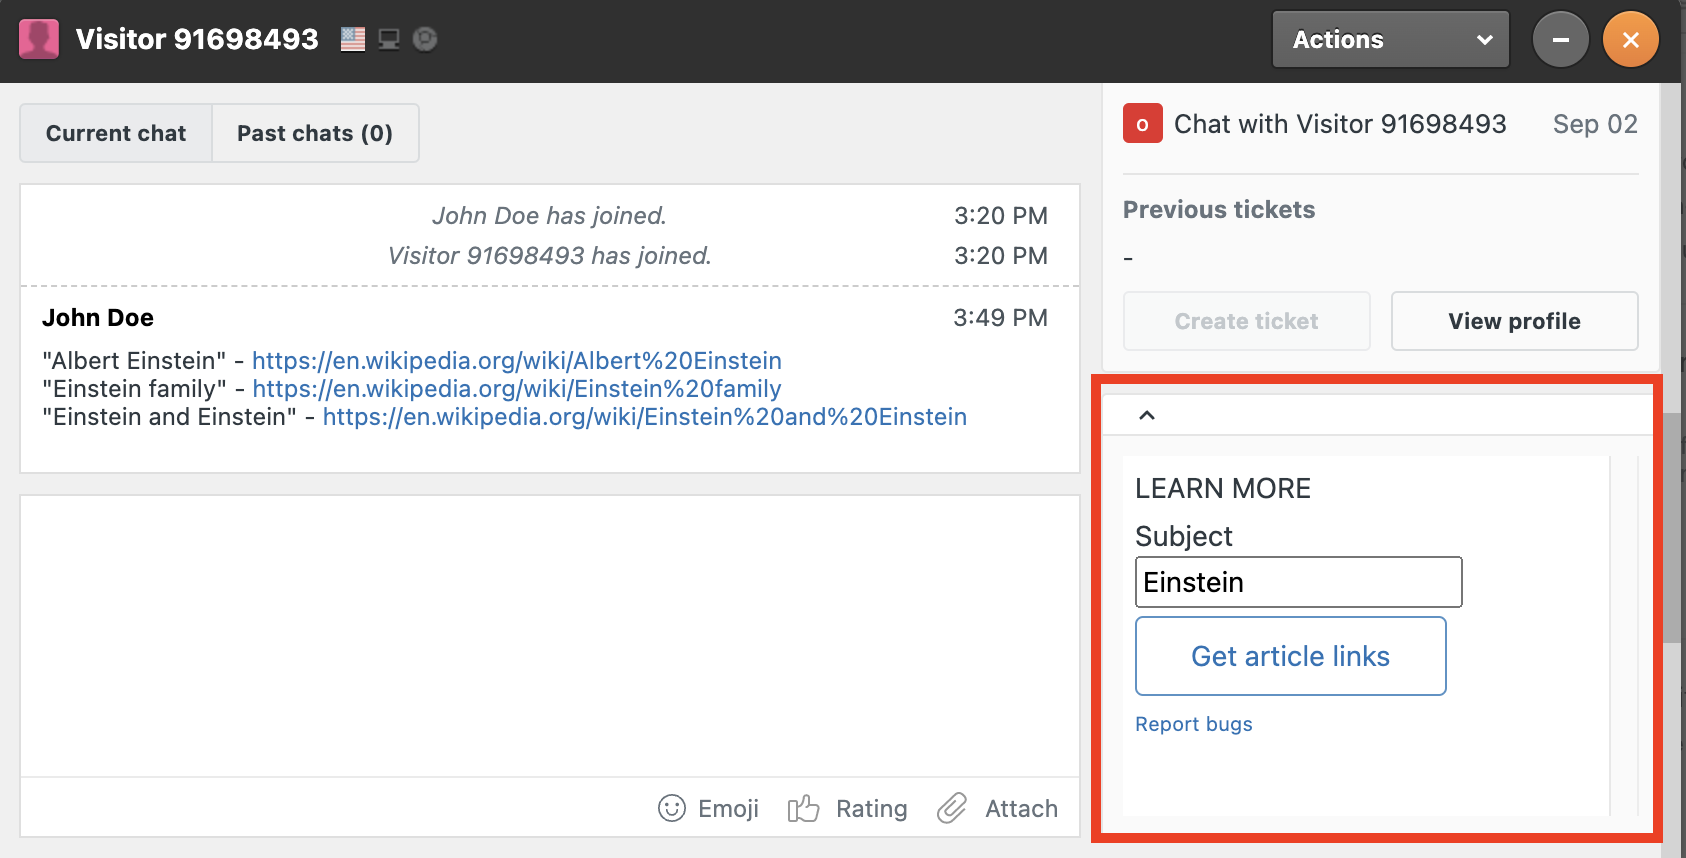
You can run a Zendesk app in different locations in the Zendesk Chat and Zendesk Support user interfaces. In this tutorial, you set the app's location to the sidebar of the chat window that opens after an agent responds to or initiates a chat with a visitor:
Set the app location in Chat
-
In a text editor, open the file named manifest.json in your app folder (/learn_more/manifest.json).
The manifest.json file is used to configure the app.
-
Replace the default value of the "location" property with the following value:
"location": {"chat": {"chat_sidebar": "assets/iframe.html"}}, -
Save the file.
Zendesk Chat currently has only one app location, chat_sidebar.
Reviewing the main HTML file
Your Zendesk app will live in an iframe in the chat_sidebar location you specified in the previous section. Like any iframe app, developing a Zendesk app consists of combining static and dynamic elements in the HTML file to be displayed in the iframe.
ZCLI created a default HTML file called iframe.html in your assets folder (learn_more/assets/iframe.html). Open the iframe.html file in your favorite text editor.

To interact with the Apps framework, the HTML file imports the ZAF SDK library in a script tag:
<script src="https://static.zdassets.com/zendesk_app_framework_sdk/2.0/zaf_sdk.min.js"></script>
After importing the SDK, you can use the ZAFClient.init() method to create an apps API client:
var client = ZAFClient.init();
The client provides an interface between your app and a host application such as Zendesk Chat. The client gives you a number of methods to interact with the Apps framework. Use the get() and set() methods to read and write data in the framework APIs. Use the invoke() method to run methods in the framework APIs. Use the request() method to make HTTP requests to any REST API. Use the on() method to listen to events. The starter file gives an example:
client.invoke('resize', { width: '100%', height: '200px' });
Testing the app
Your app doesn't do much yet but you can already run it using ZCLI. Run your app often to test your latest changes.
Test your app
-
In your command-line interface, navigate to the learn_more folder. Example:
cd projects/learn_more -
Start the local web server included in ZCLI by running the following command:
zcli apps:serverAfter a moment, a status message appears informing you that a local web server has started.
-
In Zendesk Chat, go to Visitors in the Dashboard and open a chat window by responding to or initiating a test chat.
If no visitors are listed, click Simulate Visitor on the Visitors page. Open the chat widget in the browser window that appears and send yourself a message. Back on the Visitors page in Chat, accept the chat to open the chat window.
The chat window URL should look like this:
https://{subdomain}.zendesk.com/chat/agent#visitors/visitor_list/state#!1320285-fWgIEuaK2FUfZC -
If you have a host-mapped domain, change the URL of the chat window to the default Zendesk domain (
https://{subdomain}.zendesk.com/...) and reload it. -
Insert ?zcli_apps=true in the chat window URL directly after /agent and before any # characters, and press Enter. Confirm that you want to leave the page and open a new one.
The updated chat window URL should look like this:
https://{subdomain}.zendesk.com/chat/agent?zcli_apps=true#home#!1320285-fWgIEuaK2FUfZCScroll down the right sidebar of the chat window and look for a panel announcing "Hello world!". If it's not there, the browser is probably blocking the HTTP content from the local ZCLI server from loading in the HTTPS page. This is known as mixed-content. You must disable the browser blocking, as described in the next step.
-
If you're using the Chrome browser, the content of your app may be blocked. Click the lock icon on the left side of the address bar and select Site settings. On the Settings page, scroll to the Insecure Content section and select Allow.
Click the lock icon in the address bar:

On the Settings page, allow insecure content:

Note: Firefox doesn't block app content but Safari does and has no option to disable blocking. You must use Chrome or Firefox to work with the local ZCLI server.
The "Hello, World!" heading of the app is specified in the iframe.html file. You're free to change or delete all the HTML markup in the iframe.html file.
Note: If you don't see "Hello, World!", make sure you've updated the location in the manifest.json file. See Setting the app's location in Chat. If still nothing happens, make sure your Chat account is on the Zendesk Suite Growth plan or above and that it's linked to a Zendesk Support account. Chat apps are only supported on these plans.
Review your mockup to identify the changes you need to make:
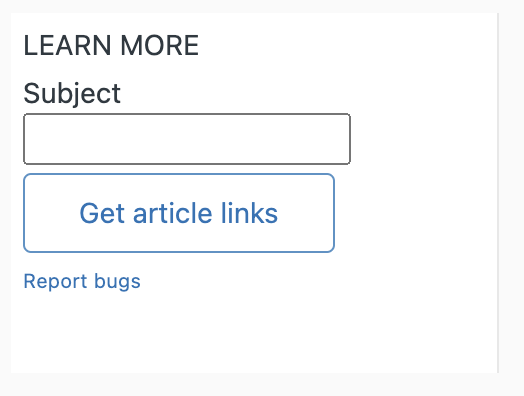
The review gives you your first to-do list:
- Change the heading
- Add a footer that displays "Report bugs" with a link to your website where users can report bugs
- Add CSS to format the user interface
- Move the CSS and the JavaScript to separate files
Note: You can ignore the rest of the UI for now. You'll insert it with a template in the next tutorial in the series.
Cleaning up the default code
-
Open the iframe.html file in a text editor and replace the "Hello, World!" header string with "LEARN MORE".
-
Remove the h2's "u-gamma" class:
<h2>LEARN MORE</h2> -
Create a file named main.js in the assets folder.
Resources such as JavaScript, CSS, and image files must be located in the assets folder.
-
Add the following function to main.js:
(function () {var client = ZAFClient.init();client.invoke("resize", { width: "100%", height: "180px" });})();The code defines a self-invoking, anonymous function that runs after the document is loaded in the browser. The function's 2 statements are the same as the ones contained in the script tag in iframe.html.
-
Back in iframe.html, delete the following
<script>tag, which is no longer needed:<script>// Initialise Apps framework client. See also:// https://developer.zendesk.com/documentation/apps/app-developer-guide/getting_startedvar client = ZAFClient.init()client.invoke("resize", { width: "100%", height: "200px" })</script> -
Replace it with the following
<script>tag to import your new script:<script src="main.js"></script>Insert the tag after the
<script>tag that references the ZAF SDK to make sure the SDK is loaded in memory before your script runs. The body of your iframe.html file should look as follows:<body><h2>LEARN MORE</h2><script src="https://static.zdassets.com/zendesk_app_framework_sdk/2.0/zaf_sdk.min.js"></script><script src="main.js"></script></body> -
Save both files.
Adding a footer
According to the mockup, the footer should display a "Report bugs" link. The spec specifies that the link should let the user go to your website to report a bug.
Add a footer link
-
In the iframe.html file, add the following footer tag before the script tags:
<footer><a href="https://mysite.github.io/support" target="_blank">Report bugs</a></footer> -
Save the file and click the reload page button on your browser.

In the mockup, the link text in the footer is smaller and uses a different typeface. In the next step, you'll add some CSS to start styling your app.
Adding styles
By default, ZCLI imports the Zendesk Garden stylesheet in the iframe file:
<link rel="stylesheet" href="https://cdn.jsdelivr.net/combine/npm/@zendeskgarden/[email protected],npm/@zendeskgarden/[email protected]">
Zendesk Garden is designed to be a common baseline of styles and components between all Zendesk products. The default link above doesn't include all Zendesk Garden assets, only the Garden component CSS and CSS utilities. For your app, you'll also need the Buttons component, which you'll import below. A complete list of assets you can import is available from the jsDelivr CDN. See https://www.jsdelivr.com/?query=zendeskgarden. The jsDelivr files are npm packages that can also be installed from npm. See https://www.npmjs.com/search?q=zendeskgarden. Use the Zendesk Garden assets if you want your app to match the look and feel of Zendesk products.
You don't have to use Zendesk Garden in your future projects. The choice is yours. For example, you could import the popular Bootstrap CSS.
For this tutorial, you stick with the Zendesk Garden styles and add modifications in a separate stylesheet named main.css.
-
In iframe.html, add the Buttons component,
npm/@zendeskgarden/[email protected], to the Zendesk Garden stylesheet link:<link rel="stylesheet"href="https://cdn.jsdelivr.net/combine/npm/@zendeskgarden/[email protected],npm/@zendeskgarden/[email protected],npm/@zendeskgarden/[email protected]">Be careful not to omit the commas that separate the components. See the Garden documentation for the Buttons component.
-
Add the following
<link>tag after the Zendesk Garden<link>tag:<link rel="stylesheet" href="main.css"> -
Create a file named main.css in the assets folder.
-
Add the following rule to main.css:
footer {font-size: 10px;margin-top: 4px;} -
Save the file and click the reload page button on your browser.

-
If you're moving to the next tutorial, you can leave the ZCLI server running. If you're done for this session, you can shut down the server by switching to your command-line interface and pressing Control+C.
In this tutorial, you cleaned up the iframe.html file created by ZCLI, moved the JavaScript in a separate file, added a footer, and added some styles.
In the next tutorial, you'll create a template to display a form to search for articles on Wikipedia. Continue to Part 3 - Creating and inserting templates.