Building a Sell app using OAuth 2.0 - Part 1: Laying the groundwork
In this five-part tutorial series, you'll learn how to build a React app for Zendesk Sell from start to finish. The app will use the OAuth 2.0 authorization framework which authenticates an app's API requests to Zendesk.
This tutorial covers the first steps to building the app:
The other tutorials in the series teach you how to build and install the app:
- Part 2: Installing the app in Zendesk Sell
- Part 3: OAuth 2.0 setup
- Part 4: Creating audiences in Mailchimp
- Part 5: Getting data from the Mailchimp API
This tutorial series uses the Zendesk Apps framework (ZAF) React Skeleton for Sell Apps to build an app. It is intended for experienced web developers who are comfortable working with advanced web tooling such as Webpack, Node, and npm packages, among other technologies.
Because the tutorials build on each other, tackle them in order and finish each tutorial before moving on to the next one.
To download the completed source code of the app in this tutorial, click sellmailchimptutorialapp.zip. You can review the code as you follow along or check your work.
Note: Zendesk provides this article for instructional purposes only. Zendesk does not provide support for the content. Please post any issue in the Zendesk Apps framework (ZAF) community, or search for a solution online.
What you'll need
To build and upload a private Sell app, you must have Zendesk Sell on the Growth plan or above. The Sell account must also be linked to a Zendesk Support account. If you don’t have a Zendesk Sell account yet, you can create a free 14-day trial.
Planning the app
You should have a good idea of how your app will look and work before you start working on it. The app is designed to list audiences to which a Sell contact subscribes. Learn more about the Mailchimp audiences.
To fetch audiences from Mailchimp, you'll need to set up OAuth to make requests to the Mailchimp API. The app will have a simple interface with a list of audiences. Each item will display the audience name and the number of subscribers. Here's a mockup of the app interface:
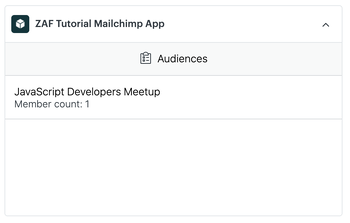
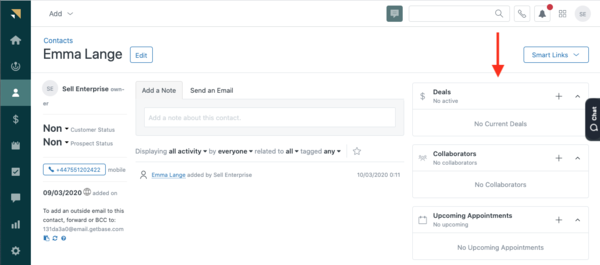
The app will appear in the right sidebar when viewing a person card in Sell.
When a user opens a person card, the app will automatically make a HTTP request to the Mailchimp API for audiences related to the person. The app then lists the audiences the contact has subscribed.
Using the scaffold template
First, you'll need to clone and download the app scaffold template which allows you to bootstrap a React-based application.
Download the app scaffold template
- Go to the ZAF React Skeleton for Sell Apps repository, then click Use this template.
- Complete the details of the repository being created, then click Create repository from template.
- Clone the repository to your local machine.
Next, install the dependencies.
Install dependencies
-
In your command line tool, run the following command to install dependencies in the package.json file:
$ npm install -
Navigate to the template folder, and run the following command:
$ npm run start
Disclaimer: Zendesk can't provide support for third-party technologies such as Webpack, Node.js, or npm packages, nor can Zendesk debug custom scaffold configurations or code.
Installing ZCLI
The Zendesk Command Line Interface (ZCLI) is a tool which allows you to perform the following tasks:
- Automatically create all the necessary files and folders for a new app
- Test your app locally in a browser
- Validate your app
- Package your app for upload
Installing ZCLI is a one-time task. Once installed, you can use ZCLI for all your Zendesk app projects. Follow the instructions in Installing and updating ZCLI. You also need to authenticate ZCLI with your Zendesk account. See Authentication in the ZCLI documentation. After you're done, return here to continue the tutorial.
If you have already installed ZCLI, make sure you are using the latest version.
Read the ZCLI apps section to get familiar with the commands used. However, don’t run the $ zcli apps:new command since the template includes all the starter files necessary to build the app.
Inside your cloned app project, the ZCLI commands are available as npm scripts which you can run in your command line tool. They can be found in the package.json file under the 'script' property. For example, to build your app you run $ npm run build which runs zcli apps:validate and zcli apps:package to validate and package your app. You’ll use those commands later.
Note: ZCLI replaces the Zendesk Apps Tools (ZAT), which has been deprecated.
App files overview
In the apps template folder you previously cloned, the dist folder contains all the required files to be included in an app to install it in Zendesk Sell. See File requirements for more information.
The src folder is where the source code lives. You can add as many files as you need when building a app. The provided files will help get you started.
The project also includes README.md where you can find information about creating an app for Zendesk Sell.
In the next tutorial, you'll specify the app location and then install the app privately in Zendesk Sell to test it. You’ll also learn how to develop the app locally. Get started: Part 2: Installing the app in Zendesk Sell.