Building your first Chat app - Part 3: Creating and inserting templates
In the previous tutorials in the series, you created the starter files for an app named Learn More and modified the HTML file that's iframed into the chat interface in Zendesk Chat. The HTML file so far displays only the title and footer of your app. In this tutorial, you'll create a template to display a form to search for articles on Wikipedia. You'll also create a template to display an error message in case there's a problem retrieving the data.
Templates are typically the building blocks of an app's user interface. They define different states, or views, for an application. For example, one template can contains an HTML form for entering search terms, and another template can dynamically list the search results.
This tutorial covers the following tasks:
- Adding a templating engine
- Creating a template for searching Wikipedia
- Inserting the template in your app
- Creating a template for error messages
This tutorial is part of a series on building a Zendesk app:
- Part 1 - Laying the groundwork
- Part 2 - Designing the user interface
- Part 3 - Creating and inserting templates - YOU ARE HERE
- Part 4 - Getting data
- Part 5 - Installing the app in Zendesk Chat
Adding a templating engine
You can use any templating engine -- and whatever version -- you like with your apps. For this project, you decide to use Handlebars.js, one of the most popular templating libraries.
-
Import the Handlebars library in your app by inserting the following
<script>tag in iframe.html before the<script>tag that references your main.js file:<script src="https://cdn.jsdelivr.net/npm/[email protected]/dist/handlebars.min.js"></script>
Creating a template for searching Wikipedia
Based on the design requirements in Planning the app, the template should display a search field and button:
In Handlebars, you can define templates by including them in <script> tags.
Create the search template
-
Open your iframe.html file and add the following
<script>tag before all the other<script>tags:<script id="search-template" type="text/x-handlebars-template"><form id="search-form"><p><label for="name"">Subject</label><br><inputtype="text"name="subject-field"id="subject-field"></p><p><button id="get-btn" class="c-btn">Get article links</button></p></form></script>The script tag defines a template consisting of a HTML form with a search box and button.
-
Style the form elements by adding the following rules to the main.css file you created in the assets folder in the previous tutorial:
body {margin: 6px;}h2 {margin-bottom: 4px;}#subject-field {margin-bottom: 4px;} -
Save the iframe.html and main.css files.
If you reload the chat window in your browser, the app doesn't change because you haven't inserted the template in the HTML yet. The next step is to insert the template and then confirm that it works.
Inserting the template in your app
You insert templates into an element of your choice in the document. You add a <div> tag in your HTML file for inserting templates at runtime. Only one template at a time can be inserted, but you can switch to a different template. For example, you can start by displaying the splash page and then switch to another page after the user clicks a button.
-
In iframe.html file, add the following
<div>tag after the<h2>tag but before the<footer>tag:<div id="content"></div> -
In main.js, add the following function call (highlighted) after the resize statement in the self-invoking function:
(function () {var client = ZAFClient.init();client.invoke('resize', { width: '100%', height: '180px' });showSearchForm();})(); -
Add your new
showSearchForm()function definition after the self-invoking function:...function showSearchForm() {var source = document.getElementById("search-template").innerHTML;var template = Handlebars.compile(source);document.getElementById("content").innerHTML = template();}The first statement in the function references the
<script>tag in iframe.html that contains the template. The second statement compiles the template. The third line generates the HTML from the template and uses it to set the HTML content of your<div>tag from step 1. -
Save both files and reload the chat window in your browser. If your ZCLI server is not already started, see "Testing the app" in part 2 of this series for instructions.
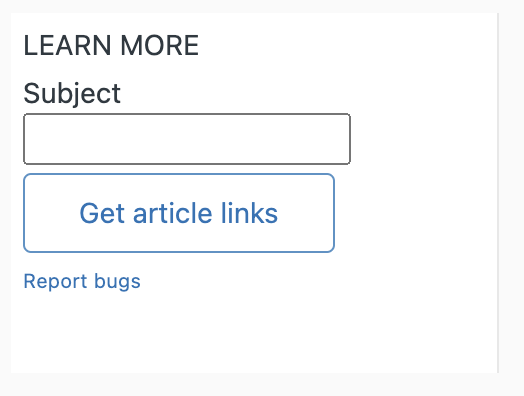
Handlebars sets the HTML content of the
<div id="content">tag in the iframe.html file:
Creating a template for error messages
If the app encounters a problem retrieving the data, you want the user to get an error message about what went wrong. The MediaWiki API returns error data structured as follows:
"error": {"code": "codestring","info": "info text"}
where codestring is a short error code and info text is a more detailed description of the error. See Errors and Warnings in the MediaWiki API documentation.
To create an error template
-
In iframe.html, add the following error template after your search template:
<script id="error-template" type="text/x-handlebars-template"><div><p style="color: red;"><strong>Something went wrong.</strong></p><p><strong>Error code</strong>: {{code}}</p><p><strong>Info</strong>: {{info}}</p><p>Please report a bug at the link below or<a id="reset-link" href="">reset</a>the form.</p></div></script>The template contains two Handlebars expressions –
{{code}}and{{info}}. A Handlebars expression typically consists of a variable inside double curly braces. When the app runs in Zendesk Chat, the expressions are replaced by values supplied by a JavaScript data object, otherwise known as a context. -
In main.js, add the following function to compile and insert the template in the iframe.html file:
function showError() {var error_data = {code: "codestring",info: "info text",};var source = document.getElementById("error-template").innerHTML;var template = Handlebars.compile(source);var html = template(error_data);document.getElementById("content").innerHTML = html;}In the first part of the function, the error_data object defines the values, or context, to the Handlebars template. You'll replace the hard-coded values later with real-time data.
The second part passes the error data to the template and renders the HTML.
-
Call the function (highlighted) from your self-invoking function:
(function () {var client = ZAFClient.init();client.invoke('resize', { width: '100%', height: '180px' });showSearchForm();showError();})(); -
To test it, comment out
showSearchForm();with double forward-slashes, save both files, and reload the chat window in your browser.Handlebars inserts the values of your error_data object in the template and generates the final HTML, which the app then sets as the HTML content of the
<div id="content">tag in the iframe.html file.
-
Once you're satisfied the error template works as intended, delete the
showError();statement in the self-invoking function. You'll call the function from a different location in the next tutorial. -
Uncomment the
showSearchForm;statement by removing the double forward-slashes before it.
If you're moving to the next tutorial, you can leave the ZCLI server running. If you're done for this session, you can shut down the server by switching to your command-line interface and pressing Control+C.
In this tutorial, you created templates to display a search form and an error message. You also learned how to insert the templates into your app. In the next tutorial, you learn how to get and display articles from the MediaWiki API. Continue to Part 4 - Getting data.