Chat Widget API overview
Note: This guide applies only to the Chat widget from Chat-only accounts, not from Chat+Support accounts. See About Chat account types in Zendesk help.
The Chat Widget API is a powerful tool you can use to customize the Chat widget on your website. For the Chat Widget API reference documentation, see api.zopim.com.
Before you can use this API, you must add the Chat Widget to your website. See Adding the Chat widget to your website.
This article outlines the typical steps for customizing the Chat widget with the API.
Step 1: Choose an API action
Select an API action from the reference docs at api.zopim.com. For example, the following action automatically sets the user's name and email address in the Chat widget:

Step 2: Customize the API action
Consult the docs to modify the API action to suit your needs.
For example, you can modify the setName() and setEmail() arguments to automatically pull information from your customer database and populate the visitor information in the chat box. Example:
<script>$zopim(function(){$zopim.livechat.setName('*|FNAME|*');$zopim.livechat.setEmail('*|EMAIL|*');});</script>
Step 3: Add the API action to your website
Locate the Chat widget code snippet in your website’s HTML code. Paste your customized API script code anywhere after the Chat widget code:
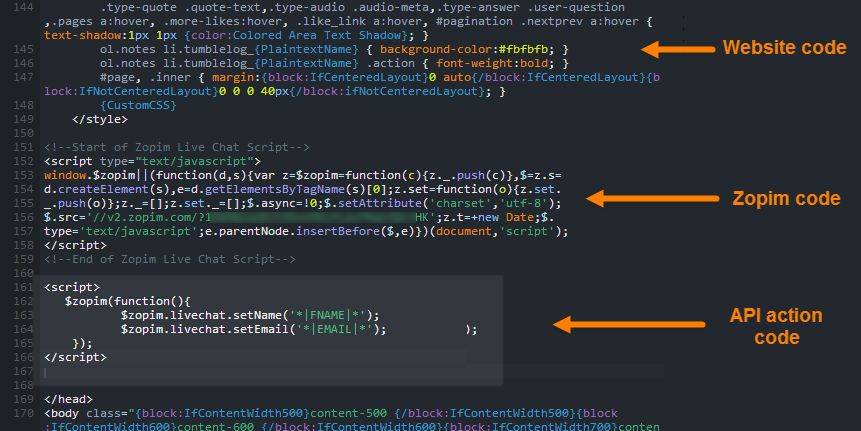
Step 4: Publish the page
Save the changes and publish the page.
The API script in this example will automatically fill in visitor information (with their name and email address) when they start a chat (provided they have already given you that information).
Next steps
Got the hang of it? The following are some ways you can customize the Chat widget with the API:
- Showing and hiding the Chat window
- Hiding the Chat widget on mobile devices
- Making elements dynamic based on agent status
- Displaying or hiding the chat bubble based on status
- Displaying custom image statuses
- Identifying visitors
- Making the widget pop up after a certain amount of time
- Tagging visitors using mobile devices
- Changing the widget language