Initializing the Support SDK (Required)
Initializing the Support SDK (Required)
You can initialize the Support SDK in your Application subclass, in an Activity, or anywhere you have access to a Context. Zendesk recommends initializing as early as possible, such as at application start time.
Prerequisites
- A Zendesk admin has registered the app in Zendesk Support. See Registering the application in Zendesk Support in Zendesk help
- You added the Support SDK to your Android project. See Adding the Support SDK
Getting the initialization settings
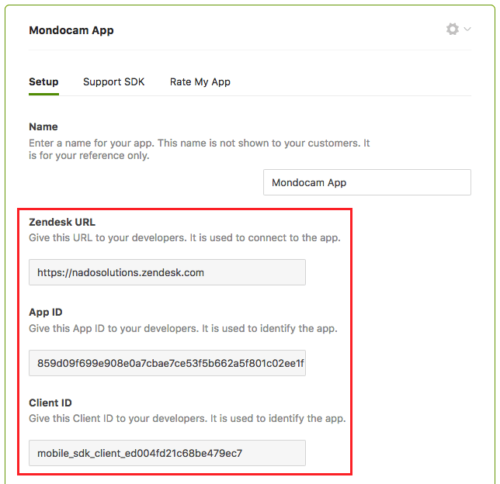
You need the following information to initialize the SDK:
- the URL of your Zendesk Support instance
- your app's id in Zendesk Support
- the client id of your app in Zendesk Support
The settings were generated in Admin Center when the Zendesk admin registered your app:

If you have admin access to Zendesk Support, sign in and go to Admin > Mobile SDK. If you don't have admin access, ask a Zendesk admin to get the information for you.
If your organization's help center has a host-mapped address, then use the host-mapped URL instead of the Zendesk URL.
Adding the initialization code
-
Paste the following code snippet in the
onCreate()method of theApplicationsubclass orActivity:Zendesk.INSTANCE.init(this, "zendeskUrl", "appId", "clientId");Support.INSTANCE.init(Zendesk.INSTANCE);Note: If you're using multiple brands you can use a brand subdomain rather than the primary subdomain in the
zendeskUrlin the code above. Keep in mind that the end user will only be able to view tickets that belong to that brand.This initializes Zendesk and the Support SDK.
Next you need to set an identity. See Setting an identity for more details.