Quickstart – Web Widget (Classic) APIs
This hands-on tutorial shows you how to embed the Web Widget (Classic) on a web page, and configure some basic settings using Web Widget (Classic) APIs.
Basic widget configuration can be performed in the Admin section of Zendesk Support > Admin. However, the widget APIs provide more extensive widget customization.
The Web Widget (Classic) APIs are client-side JavaScript APIs that can be used in your website. It lets you change properties of the widget using settings or perform actions using commands. This quickstart shows you how to work with both settings and commands.
Though not necessary to work through this quickstart, a general understanding of HTML and JavaScript is recommended to use the API in your organization's website. For more information, see HTML Introduction and JavaScript MDN.
Related information:
Requirements
-
CodePen, a free online code editor. While this tutorial uses CodePen, you can use other code editors such as JSFiddle and JS Bin.
-
A Zendesk Support account or a trial account. You can request a sponsored test account that doesn't expire after 14 days like the trial account.
-
Supported web browsers for the widget, as described in Using Web Widget (Classic) to embed customer service in your website.
Creating a sample web page
In this section, you'll create a “Hello World” web page in CodePen, an online code editor.
To create a “Hello World!” web page
-
In your web browser, go to https://codepen.io/pen/.
-
In the top UI pane, click Change View, and select the left view option.
-
In the HTML editor on the top right side, click the dropdown menu, and select Maximize HTML Editor.
-
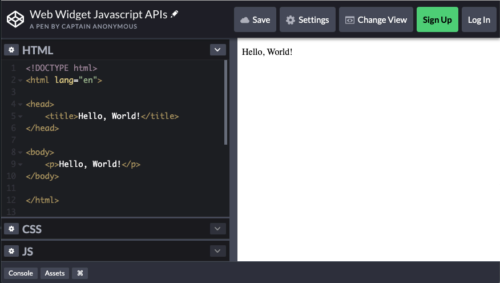
Copy and paste the following HTML code into the HTML editor.
<!DOCTYPE html><html lang="en"><head><title>Hello, World!</title></head><body><p>Hello, World!</p></body></html>
The web page is displayed in the window on the right side.
Adding the Web Widget (Classic) on your web page
To add the widget on your web page, you need to copy and paste the Web Widget (Classic) script in Zendesk Support.
- In Admin Center, click the Channels icon (
 ) in the sidebar, then select Classic > Web Widget. If you don't have admin access, ask a Zendesk admin to get the information for you.
 - Click the Setup tab, if it is not already selected.
- Under the code box, click Copy to clipboard.
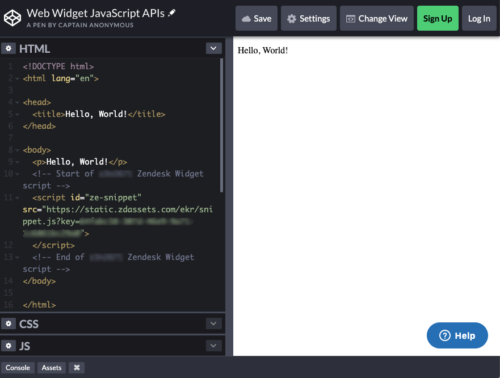
- In your HTML editor, paste the script before the closing tag. For example:
<!DOCTYPE html><html lang="en"><head><title>Hello, World!</title></head><body><p>Hello, World!</p><!-- Start of Zendesk Widget script --><script id="ze-snippet" src="https://static.zdassets.com/ekr/snippet.js?key=YOUR_SNIPPET_KEY"></script><!-- End of Zendesk Widget script --></body></html>
By default, the widget is displayed on the bottom right of your web page.
Using API settings to customize the Web Widget (Classic)
Next, you’ll use the API settings to change some common Web Widget (Classic) properties. You access the API settings using JavaScript in the source code of your website. You can add the scripts directly to your web page, or maintain them in a separate folder and link to them from the web page. For the purposes of this tutorial, we’ll add scripts directly to the web page.
The basic JavaScript syntax for API settings is as follows:
window.zESettings = {webWidget: {setting,setting,...}};
The syntax can vary for API settings. For example, the offset API setting has multiple property value pairs, and channel-specific settings such as the attachment API setting for Contact Form contains a child object.
The window.zESettings object must be added before the Web Widget (Classic) snippet in a web page, so the settings can be applied before the widget is loaded.
In the following sections, you’ll use core settings to change the color of the widget and to reposition it. For a complete list of core settings, see the Web Widget (Classic) API documentation.
Changing the Web Widget (Classic) color
In this example, the widget’s default blue color will be changed to green using the theme property of the color setting. The theme property accepts HEX codes. For example:
<script type="text/javascript">window.zESettings = {webWidget: {color: { theme: '#78a300' },}};</script>
To change the widget color
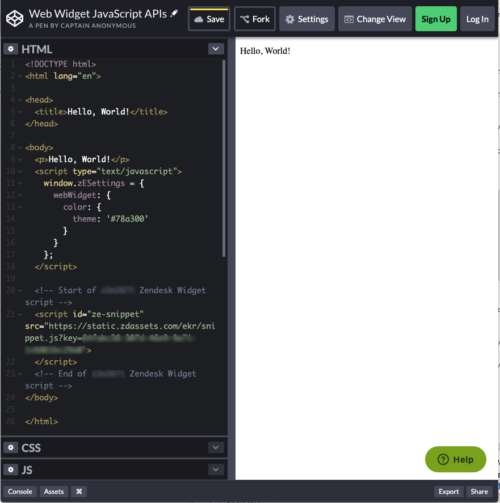
In the HTML editor, paste the highlighted script after the header tags, but before the Web Widget (Classic) snippet.
<!DOCTYPE html><html lang="en"><head><title>Hello, World!</title><meta charset="utf-8"></head><body><p>Hello, World!</p><script type="text/javascript">window.zESettings = {webWidget: {color: { theme: '#78a300' },}};</script></script><!-- Start of Zendesk Widget script --><script id="ze-snippet" src="https://static.zdassets.com/ekr/YOUR_SNIPPET_KEY"></script><!-- End of Zendesk Widget script --></body></html>
The Web Widget color on the web page should be green.
Changing the Web Widget (Classic) position
Next, you'll reposition the widget on the web page to be 100px from the bottom and 100px from the right. You can reposition the widget using the offset setting.
To change the Web Widget position
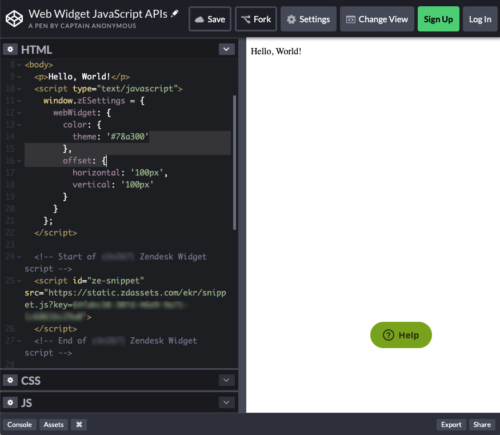
In the HTML editor, add the offset setting to the existing window.zESettings object, setting the horizontal and vertical parameters to 100px. Make sure you don’t forget to add a comma after the color setting. For example:
<script type="text/javascript">window.zESettings = {webWidget: {color: { theme: '#78a300' },offset: { horizontal: '100px', vertical: '100px' }}};</script>
The web page should display the repositioned widget.
Using API commands to customize the Web Widget (Classic)
Commands let you customize some general settings and functions embedded in the Web Widget. It follows the following basic syntax:
zE('webWidget:<action>', '<event|property>', <parameters>);
where
is a Web Widget (Classic) setting or action - <event|property> is a property or event associated with the setting or action
is an argument o value associated with the event or property.
Note: All API commands must be placed after the Web Widget (Classic) snippet in your web page source code.
In the following sections, you’ll use core commands to set the locale of the Web Widget and to hide it. For a complete list of core commands, see the Web Widget (Classic) API commands.
Setting the Web Widget (Classic) locale
By default, the Web Widget (Classic) displays the language that matches the header of the web browser. In this instance, we would like to change the widget's locale to French.
The setLocale command sets the language for the widget. Supported locales are shown in https://support.zendesk.com/api/v2/locales/public.json.
To change the locale
In the HTML editor, add the following setLocale command between script tags after the Web Widget (Classic) snippet:
<script type="text/javascript">zE('webWidget', 'setLocale', 'fr');</script>
The widget on the web page should display in French.
Hiding the Web Widget (Classic)
Next, you'll create a button to hide the Web Widget (Classic) using the hide command. It can also be used to hide the widget before the page loads.
To create a button to hide the widget
In the HTML editor, between the body tags, add the following hide command using button tags:
<button onclick="zE('webWidget', 'hide')">Hide Web Widget</button>
The Hide Web Widget button should be displayed on the web page. Clicking on the button hides the widget.
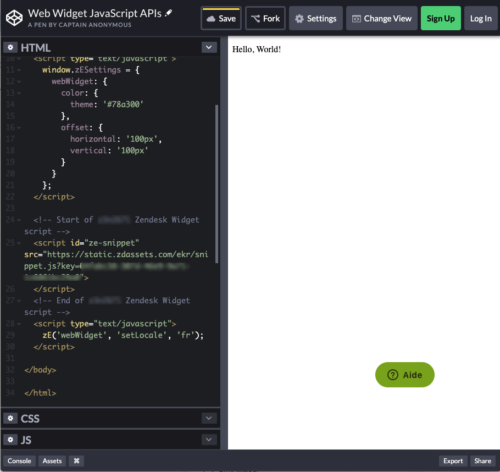
After configuring your widget, your HTML file should look something like this:
<!DOCTYPE html><html lang="en"><head><title>Hello, World!</title><meta charset="utf-8"></head><body><p>Hello, World!</p><script type="text/javascript">window.zESettings = {webWidget: {color: {theme: '#78a300'},offset: {horizontal: '100px',vertical: '100px'},};</script><!-- Start of Zendesk Widget script --><script id="ze-snippet" src="https://static.zdassets.com/ekr/YOUR_SNIPPET_KEY"></script><!-- End of Zendesk Widget script --><script type="text/javascript">zE('webWidget', 'setLocale', 'fr');</script><button onclick="zE('webWidget', 'hide')">Hide Web Widget</button></body></html>